Monday, October 31, 2011

31 days of warming up to the holidays: {day 31} the jesse tree

One of the traditions that I’m excited to start with our little family this year is that of the Jesse  Tree.  Jesse Trees were originally found in churches and depicted Jesus’ family (much like the family trees of today) in wood, stone, or stained glass.  Unfortunately, most were destroyed in the seventeenth century.  However, a new type of Jesse Tree has emerged in the form of an advent of sorts.  One story is told each day – beginning with Creation, all the way through the Old Testament, and ending with Jesus’ birth – and an ornament is placed on a tree.  The 25 ornaments each show a picture that correlates with the devotion of the day.

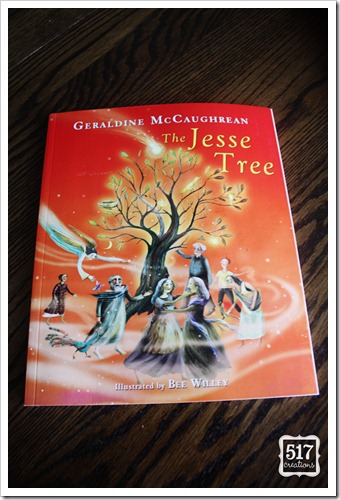
The book that I bought to use with our family is this one, The Jesse Tree , written by Geraldine McCaughrean, and beautifully illustrated by Bee Willey.
IMG_9383e

This book is written in a storybook form, beginning with an old carpenter carving a Jesse Tree.  A little boy begins asking him questions about it.  What follow are the stories told by the carpenter that explain the carvings on the Jesse Tree.
IMG_9384e

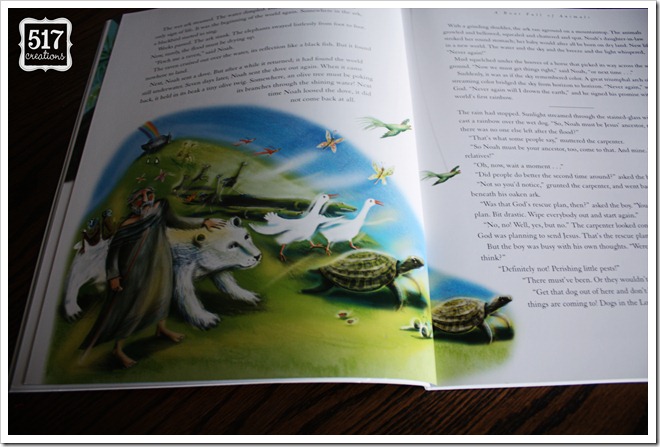
Here is the illustration that goes along with the story of Noah and the ark.  Isn’t it beautiful?

The ornaments we’ll be using are from Ann Voskamp of A Holy Experience.  If you sign up to receive her feeds by e-mail, you’ll get a free download of the entire Jesse Tree advent booklet.  It’s a beautifully written booklet with a devotion for each day and 25 printable ornaments.

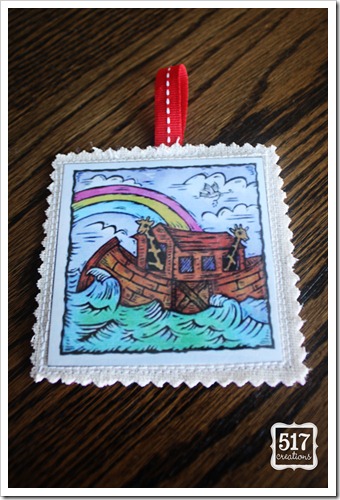
I wanted to reinforce our ornament a bit as a 3 (almost 4!!) year old would be the one handling the ornaments – and I certainly want to encourage him to look at them and touch them while we do our devotional.  I printed the ornaments out on cardstock and backed them with fabric.  To make them even more kid-friendly, I added a layer of vinyl on top.
IMG_9381e

Look for a tutorial later this week for making your own kid-friendly ornaments!

I’m so glad that you’ve come along on this 31 day journey with me and I hope that you’ll start the Jesse Tree tradition in your home…what a fantastic way to prepare your hearts for Christmas!

*********************

Is this your first time reading my 31 days series?  If you’d like to find the rest of the posts, click here to go to the welcome page complete with links for the other 30 days!

Saturday, October 29, 2011

31 days of warming up to the holidays: {day 29} link love 10.29.2011


It’s the final link love of my 31 days series!  I’ll continue to post a little link love each Saturday, though.

                                                                    Source: andyandjessicaolsen.blogspot.com via Mary Jo on Pinterest


These would be cute neighbor gifts, made with the family's last name...or could stand in for gift tags if you used first names!

                                                                       Source: pinksuedeshoe.com via Mary Jo on Pinterest


I love this idea of a Christmas tree advent! At first I thought that my child would totally lift up the trees and find what was underneath...but when I read the post I realized that the trees had bottoms on them! You rip the tree apart to get to the treat inside. Such a great idea and it doubles as a cute decoration!

                                                                          Source: positivelysplendid.com via Mary Jo on Pinterest


Positively Splendid has some great guest posts right now in a series called Swell Noel. This post has recipes for gifts in a jar and super cute printable tags to attach!

                                                                         Source: memoriesoncloverlane.com via Mary Jo on Pinterest


This is a great way to display Christmas photos from years past...if we only had a staircase to put them on! I think this idea would be cute across a mantle or large window, too!

If you’re new to my blog, check back each Saturday for more link love!

Friday, October 28, 2011

31 days of warming up to the holidays: {day 28} advent calendar ideas

IMG_9336e
There are lots of ideas floating around blogland for things you can include in your advent calendar.
You can create an advent of Christmas memories/traditions.
Why not sew 24 little draw string bags and put treats inside?
Or take it a step further and put ornaments in them – whether they are special ornaments to decorate the tree with or ornaments for your Jesse Tree (like one sweet blogger commented!)?
I’m in the middle of sewing those 24 little bags to put our Jesse Tree ornaments in them.  I’ll post later next week to show you exactly how I make our ornaments!

Thursday, October 27, 2011

31 days of warming up to the holidays: {day 27} merry christmas printable banner

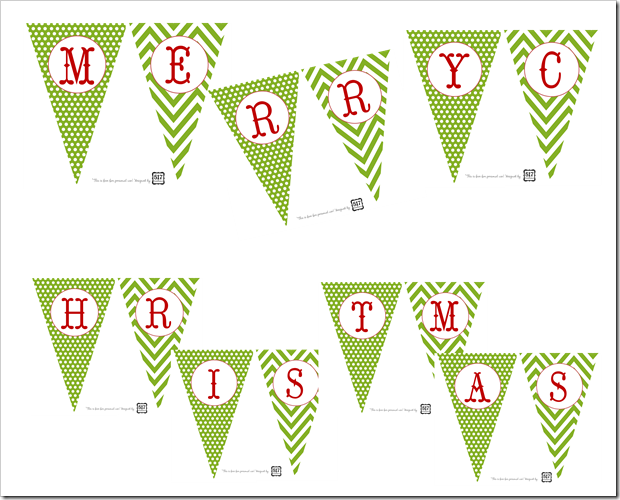
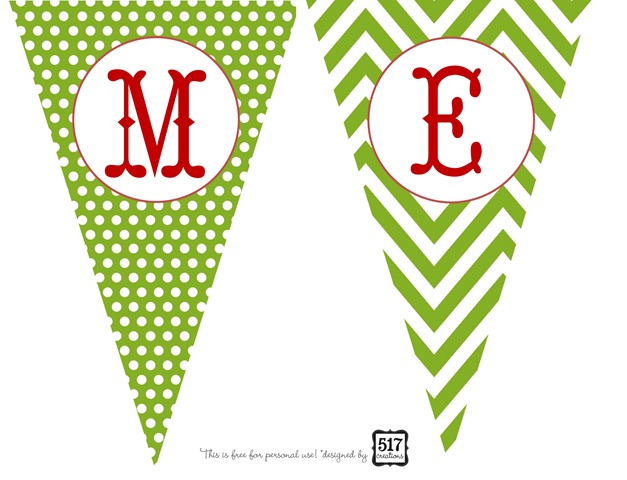
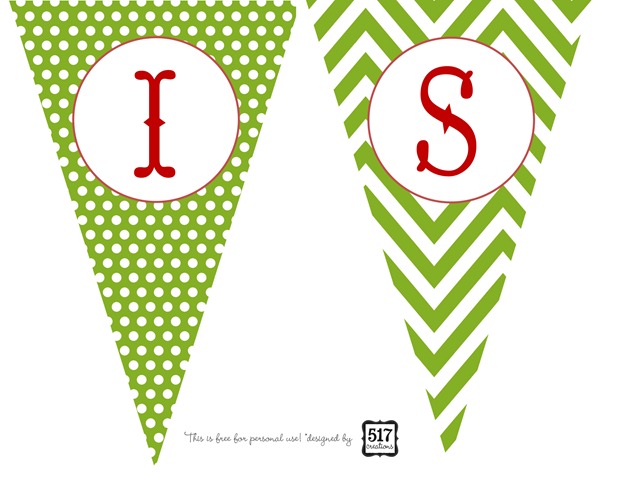
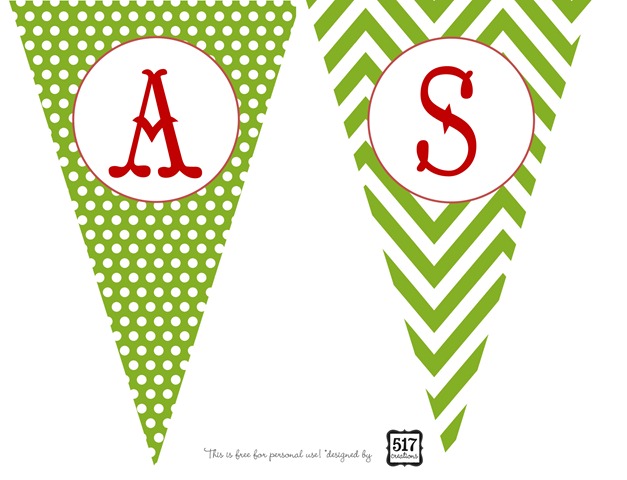
Today’s printable is a printable Merry Christmas banner in lovely apple green polka dot and chevron prints!  I am loving the apple green and red color combination for Christmas this year!

merry christmas

Simply right-click on the pages below and save them to your computer.  Print them out on your home printer, punch holes in the corners, and string them together!

merry_christmas_banner-1merry_christmas_banner-2merry_christmas_banner-3merry_christmas_banner-4merry_christmas_banner-5merry_christmas_banner-6merry_christmas_banner-7

Just a little reminder that these are free for personal use only!

Wednesday, October 26, 2011

31 days of warming up to the holidays: {day 26} clothespin Christmas countdown

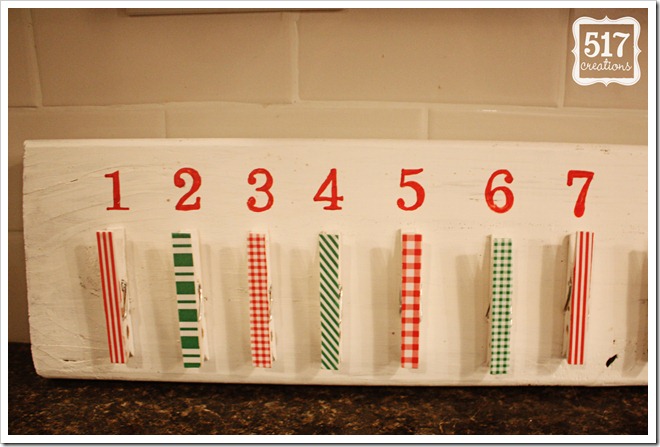
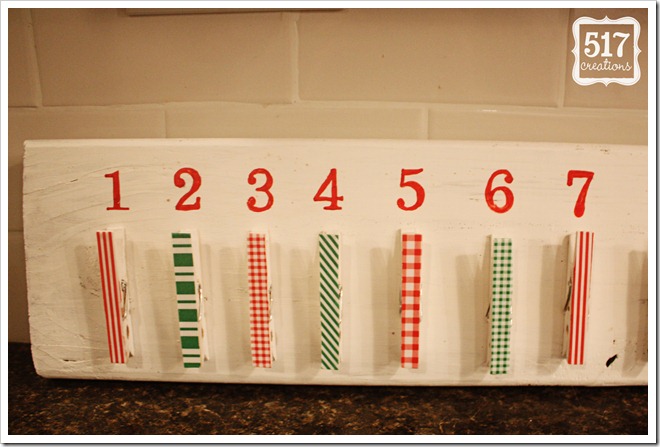
I came across this pin on Pinterest and loved the countdown…but the link went to tumblr, not a tutorial.  So I did what any good DIY blogger did and made my own!

IMG_9336e

Here’s what I used to make my clothespin Christmas countdown:
A scrappy board that I found in our shed – it measures 5 1/2 inches x 48 inches
White paint
24 clothespins
Mod Podge
Scrapbook paper – to cover clothespins
Glue gun
Red paint pen

I gave the old, scrappy board a coat of white acrylic craft paint.  I wanted it to be a little rustic looking, so I didn’t worry about sanding it or giving it more than one coat.  While that was drying, I gave the clothespins a quick (and rough) coat of white paint.

Once the clothespins were dry, I cut pieces of red and green patterned scrapbook paper to fit on the “front” of the clothespin.  I Mod Podged the paper on and then put 2 coats of Mod Podge on top to seal them.

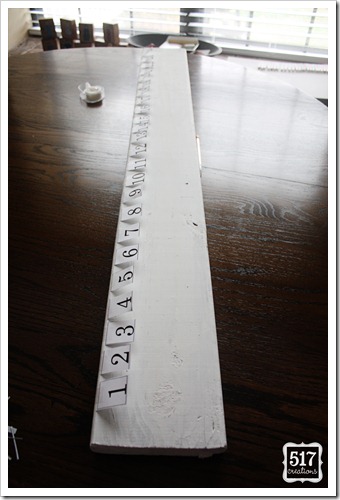
Now I was ready to embellish my board.  I printed out the numbers 1-24 using the Century Schoolbook font, size 90.  I cut the numbers apart and arranged them on my board.  I didn’t measure anything exactly, but I did lay all of the clothespins out on the board, trying to spread them out evenly.  I made a little pencil mark at the top of the clothespin so I knew where to place my numbers.

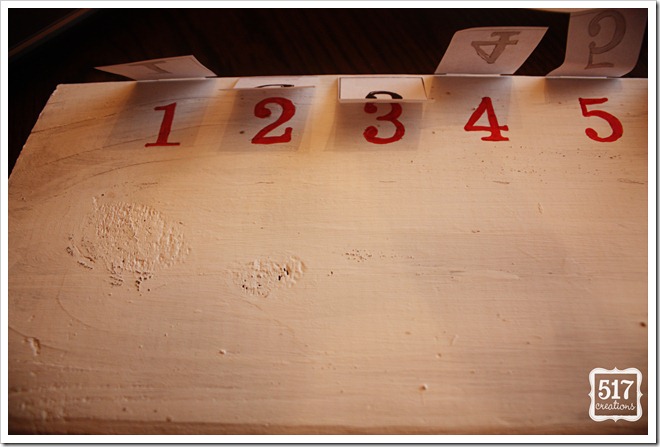
Using my pencil marks as a guide, I taped the top of each number onto the board.  I wanted to numbers to be able to “flip up” so I could trace them.

IMG_9325e

I traced the numbers onto the board using a method that I found on Pinterest.  It really does work!  You put a piece of newspaper under the paper you want to trace, but on top of the board.  Trace over the numbers with a ball point pen and the print transfers ever so lightly onto your board!
 
IMG_9327e

After tracing the numbers I went back and filled them in with a red paint pen.  I left the numbers attached to the board until I was finished painting all the numbers – so I could flip the number back to check my work.

IMG_9328e

The numbers look stamped in the original, and that would definitely be easier – but I wanted to use what I had on hand!

IMG_9329e

It’s time to attach the clothespins!  I used hot glue, but we’ll see how long that holds up.  I simply used the hot glue gun to attach each clothespin under the number.  (If you have Gorilla Glue or another adhesive, that might be a better long-term option.)

IMG_9332e

IMG_9336e

I’ll be back on Friday with different ideas of items that you can “hang” from your clothespins to help your kiddos countdown to Christmas!

Tuesday, October 25, 2011

31 days of warming up to the holidays: {day 25} a menu planner and a recipe


Thanks to Tervis for sponsoring my writing. Visit their website http://www.tervis.com to learn more about the world’s first smart cup.


holiday_menu_planner

Today’s post has been brought to you by Tervis and is about lifestyle tips.  My biggest lifestyle tip for you when it comes to planning for the holidays is to actually PLAN!  If your calendar is anything like mine, every weekend in late November and all of December is already filled to the brim.  It’s such a fun time of year but it’s often the most busy time of year.

I’ve designed a free menu planner printable to help you plan for those holiday parties that you’ll be hosting.  Whether it’s a pot luck or a Christmas feast for 50, it’ll go much smoother if you start your planning early.  Figure out your menu – what you’ll be serving or what other’s will be bringing – and post it somewhere in your kitchen.  You can then use that menu plan to make out your shopping list to avoid those last-minute runs to the grocery store for cranberry sauce, only to find out that they’re sold out!

This menu plan will also help on the day of your event – or the days before.  Follow your plan to see what you can fix ahead.  Many dishes can be made several days ahead and put in the freezer…what a great way to save time on the day of the event!

To print your own menu planner, right-click on the photo and save it to your computer.  You can then print as many as you want from your own printer!

To help you fill in that menu planner, I’m going to leave you with one of my favorite salad recipes.  It tastes and looks like a gourmet salad, but it’s really easy to put together!


Pear Pecan Salad
Ingredients for the salad:
     1 bag of lettuce (any that you prefer)
     1 bag of fresh spinach
     2 pears, sliced
     1/2 cup of pecans, chopped
     2 tablespoons of sugar (to coat the pecans in before you toast them)
     1 cup feta cheese

Ingredients for the dressing:

     1 cup oil
     1/2 cup white vinegar
     1/2 cup sugar
     1 tablespoon salt
     1 tablespoon dry mustard
     1 teaspoon paprika
     A handful of chopped green onion
     1 teaspoon celery seed

Toast pecans that have been coated in sugar. Mix ingredients for salad and top with feta cheese.

Blend the ingredients for the dressing together in a blender or food processor.  Chill.

Pour well-chilled dressing over mixed salad just before serving.

 
Instead of toasting my own pecans, I use these salad toppers that I found in our local grocery store:


I was selected for this sponsorship by the Clever Girls Collective. To learn more about Tervis, visit their website http://www.tervis.com.

Monday, October 24, 2011

31 days of warming up to the holidays: {day 24} a great teacher gift

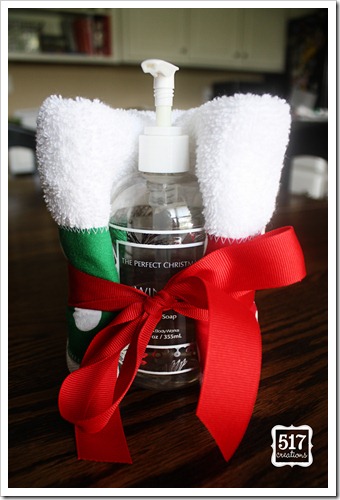
towel1


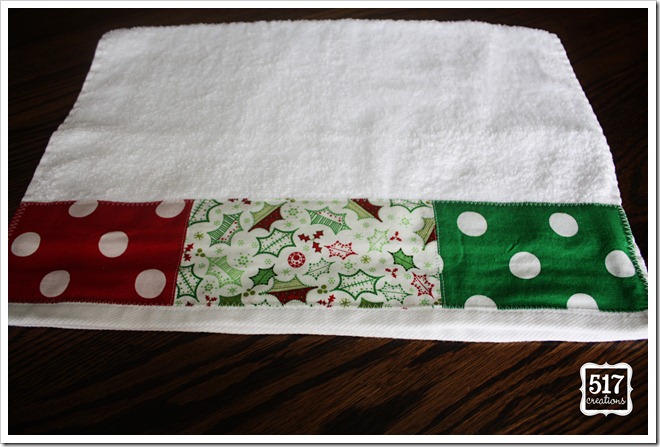
towel4

Here’s a great (and EASY – if you can sew) teacher gift for your kiddo’s teacher this Christmas.  These would also make hostess gifts throughout the holidays.

Piece Christmas fabric together and sew it on to a plain white bath towel or kitchen towel.  Fold it up, wrap it around a holiday soap from Bath & Body Works, add a cute ribbon, and you’re done!

Sunday, October 23, 2011

Christmas printables…


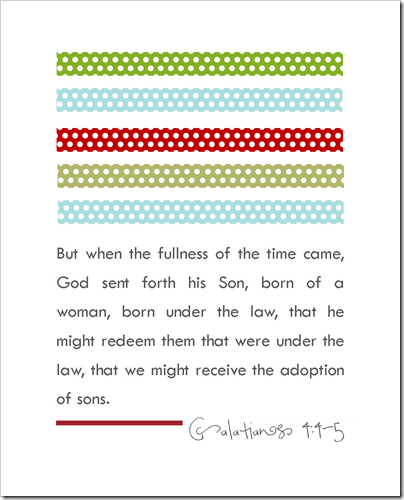
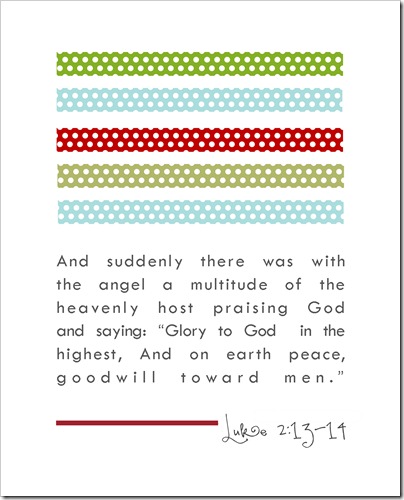
Did you start your Christmas decorating this weekend?  We did! I went to print out my Christmas Scripture series and thought some of you might want to print them out, too.  Here are a few of the Christmas printables that I’ve designed (so far)…I’ll post the second batch tomorrow!  Enjoy!

galatians4_4_5

Looking for a .pdf of this printable?  Download it here.

isaiah9_6

Looking for a .pdf of this printable?  Download it here.

luke2_13_14

Looking for a .pdf of this printable?  Download it here.

scripture_luke2_7

Looking for a .pdf of this printable?  Download it here.

scripture_matthew1

Looking for a .pdf of this printable?  Download it here.

If you download any of the printables, leave me a comment!  I’d love to know that you’re using them in your decorating!

Saturday, October 22, 2011

31 days of warming up to the holidays: {day 22} link love

I have some great DIY links for you this weekend!

                                                                             Source: sew4home.com via Mary Jo on Pinterest


I love the idea of matching PJs for Christmas...my husband, on the other hand, is not so crazy about it.

                                                                                  Source: sew4home.com via Mary Jo on Pinterest

How cute is this pom-pom pillow? I am definitely making a couple of these for our house this winter.         
                                                                       Source: theinspiredroom.net via Mary Jo on Pinterest


Such an easy DIY...pour epsom salt into a mason jar, add a candle, light the candle. Simple but stunning. How great would these look lining a walkway to your front door?

                                                                 Source: positivelysplendid.com via Mary Jo on Pinterest


This may be my favorite idea. DIY stocking holders for less than $5!

Friday, October 21, 2011

31 days of warming up to the holidays: {day 21} extreme makeover home edition

I apologize for the lack of post today, but we've been doing our part to make sure that 7 families have a new home to spend the holidays in this year.


Extreme Makeover Home Edition is in Joplin building 7 homes in 7 days for families who lost their homes in the May 22nd tornado.

I spent the day with friends from church serving food to over 600 volunteers - that's a LOT of spaghetti - and Scott is working overnight laying backer board in some of the bathrooms.  We're so blessed to have the chance to play a small part in such a great project!

And yes, I totally had to the urge to yell "Move that BUS!" while standing in front of the bus with Ty Pennington! :)

Thursday, October 20, 2011

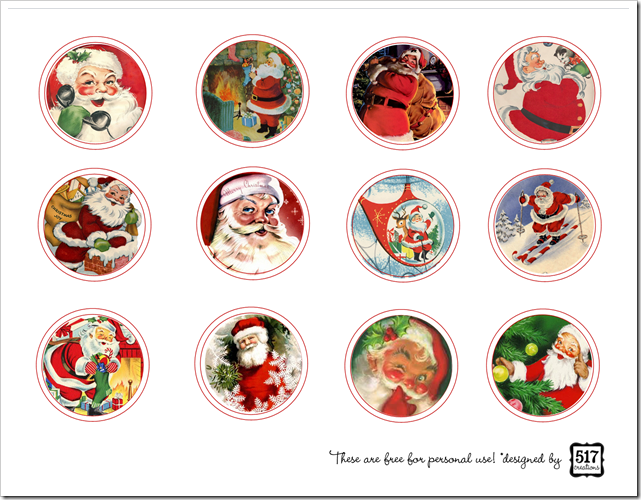
31 days of warming up to the holidays: {day 20} vintage santa toppers

santa toppers_web
A friend recently gave us a bunch of vintage Golden Books, including several Christmas books.  After reading those for a few weeks, I have fallen in love with vintage Santa images.  I turned to the internet to see what I could find and came across lots of free images!  I turned those images into these sweet toppers.  You can use these for cupcake toppers, gift tags, etc.  I can’t wait to see what you crafty people come up with!

To download the .pdf file of these Vintage Santa Toppers, click here.

31 days_150

*Just a friendly reminder that these are free for personal use!

Wednesday, October 19, 2011

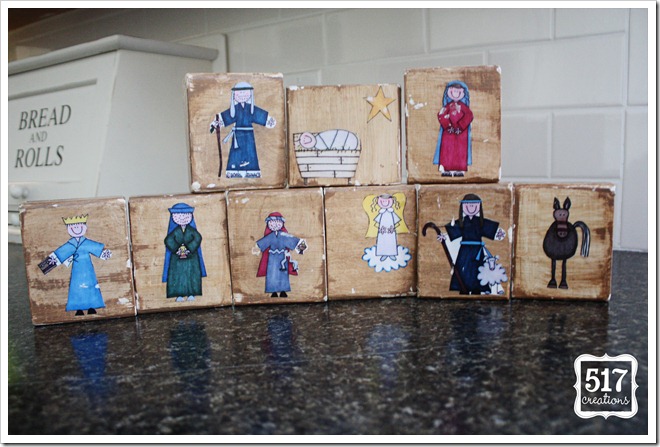
31 days of warming up to the holidays: {day 19} wooden nativity blocks

IMG_9222e

When Grayson was just shy of 1, I was in charge of the crafts for our MOPS meetings.  This is the craft that I came up with and it’s one of my favorite things to pull out of our Christmas decoration bins.

I wanted to make a nativity that my little guy could play with…that I wouldn’t be worried about him breaking.  Then I found this blog post one day and loved it!  The stickers that they used are out of print, but you can download the clip art that I used here: http://www.pccrafter.com/shopping/ProductDetails.aspx?id=168&s=1  The clip art has many more “characters” including King Herod, the inn, the star, etc.

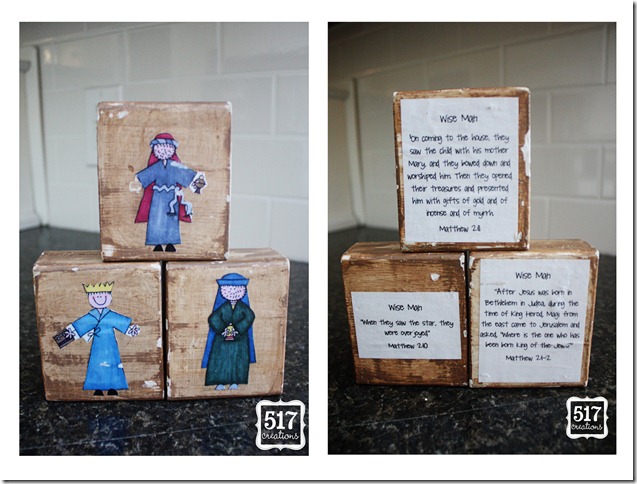
I took it a step further than the original blogger did and added Bible verses to the back of my blocks.  This makes it easy to tell Grayson about the Nativity while playing with him…and hopefully these blocks will still be around when he can read the verses for himself!

mary_joseph_jesus

wise_men

shepherd

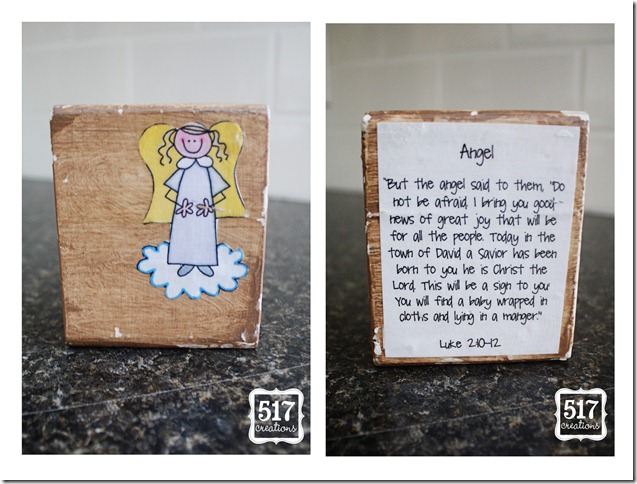
angel

Here’s what you need for the blocks:

  • 1 2x4 piece of lumber
  • A print out of the clip art – I printed mine on a laser printer because ink from an ink jet printer tends to bleed when you use Mod Podge on top of it.
  • Paint of your choice
  • Mod Podge

1.  Cut your 2x4 into 3-inch pieces, enough for the amount of characters that you’d like in your Nativity.  You’ll have blocks that are roughly 3 1/2 x 3 inches, because  a 2x4 isn’t really 2 inches x 4 inches.

2. Sand down any rough edges.

3. Paint your blocks the color of your choice.  I painted all of my blocks white, then went over them with a light coat of brown.

4. While the paint is drying, cut your clip art out.

5. Once your blocks are dry, adhere the figures to the blocks using Mod Podge.  Put a coat of Mod Podge over the top of the figure, too.

6.  Adhere the verses to the back of the blocks if you’d like.

7. I didn’t do this step, but you might spray them with a clear sealer of some sort.  My blocks probably wouldn’t look as worn if I had sealed them.

8.  Wrap them up for your favorite child!


If you’d like a .pdf file of the verses for each character, send me an e-mail and I’ll gladly send them to you!

Tuesday, October 18, 2011

31 days of warming up to the holidays: {day 18}: Double Chocolate Peanut Butter Cookies

I am going to share one of my FAVORITE cookie recipes with you.  It's a great recipe to take to cookie exchanges or holiday parties. Just be sure you have a copy of the recipe handy because people will ask for it!

Double Chocolate Peanut Butter Cookies
Makes 3 dozen

1/2 cup butter
1/2 cup sugar
1/2 cup light brown sugar
1 egg
1 cup flour
1/3 cup unsweetened cocoa
1 tsp baking soda
1/8 tsp salt
1/3 cup creamy peanut butter
1 tsp vanilla extract
1/2 cup semi-sweet chocolate chips

Beat butter until creamy.  Gradually add sugars, beating well. Add egg and beat until just blended.

Combine flour and next 3 ingredients (cocoa, baking soda, salt).  Gradually add to butter mixture, beating at a low speed until blended. Add peanut butter and vanilla extract, beating until blended.  Stir in chocolate chips.

Drop dough by rounded teaspoonfuls (I use a cookie scoop - it makes this step SO much easier), 2 inches apart onto ungreased cookie sheets.

Bake at 375 degrees for 7 minutes - do not overbake!  They will still look soft but take them out at 7 minutes, I promise.  Remove to wire racks and let cool for 15 minutes.


Monday, October 17, 2011

31 days of warming up to the holidays: {day 17} pinspiration

I saw a advent countdown board on Pinterest and loved it.  I’m working on a tutorial for an advent countdown, but am not quite finished…so I’m going to leave you with a little advent calendar "pinspiration" tonight!  I hope to post the tutorial sometime this week!

                                                                          Source: ohdeedoh.com via Mary Jo on Pinterest


                                                               Source: infarrantlycreative.net via Mary Jo on Pinterest
       

                                                        Source: afmwords.blogspot.com via Mary Jo on Pinterest
        

Do you use an advent calendar to help your kiddos count down to Christmas?
Related Posts Plugin for WordPress, Blogger...