Wednesday, January 30, 2013

Mollie Kate is two months old...


I can't believe that this sweet baby girl of mine is two months old!  It seems like just yesterday that we found out we were adding a girl to our family but we also can't remember life without her!


Mollie is the sweetest, happiest baby on the block...just like her big brother was.  She smiles at everyone, although she definitely reserves her biggest smiles for Grayson.  Mollie "talks" and coos at us and is THIS CLOSE to laughing...I'm secretly not-so-secretly hoping that I'll be the first to hear her laugh.

MK is a great sleeper, already sleeping from about 10:30 or 11pm until 6:30am!  She wakes up happy and smiley - we couldn't ask for much more!

And just to show how much Mollie Kate has grown in just a few short weeks, here's a peek at her at one month and two months.


Friday, January 25, 2013

customized iPhone wallpapers...


* I posted this over at Worthy of the Prize's {Hope for the Home} blog last week and thought I would share it here, too! *

If you're like me, you always have your iPhone handy, though.  So,  I designed a customized Lock Screen and Home Screen for my iPhone...and I'm sharing it with you!  This pink chevron "Fruit of the Spirit" lock screen and home screen images are perfect for the upcoming Valentine's Day holiday!


* "Fruit of the Spirit" Lock Screen *


* Coordinating Home Screen *


To customize your Lock Screen image, follow these steps:

- Download image from this post and email it to yourself.
- Open the email on your iPhone.
- Save the images to your Camera Roll.
- Now open the image and tap "Use as Wallpaper".


- Move and scale the image to your liking, tap "Set".


- Tap "Set Lock Screen" to save the image as your Lock Screen.


- Your Lock Screen is customized!


To customize your Home Screen image, follow these steps:

- Download image from this post and email it to yourself.
- Open the email on your iPhone.
- Save the images to your Camera Roll.
- Now open the image and tap "Use as Wallpaper".
- Move and scale the image to your liking, tap "Set".
- Tap "Set Home Screen" to save the image as your Home Screen.


- Your Home Screen is customized!


Wednesday, January 23, 2013

DIY silhouette pendant

I know I'm not alone in my love for silhouettes!  In fact, it was on a "silhouette love" blog post that I stumbled upon these fantastic custom-made silhouette necklaces on Etsy.  However, the $90+ price tag was a little much for me...and I kind-of like to do things myself.  I get lots of compliments on my necklace and thought I'd share a quick tutorial so you can DIY your own!


This is a really simple and affordable project. Here are the items you'll need...


Blank pendant/locket - I chose to use a locket for mine so I didn't have to fuss with clear glaze and could change the silhouette out as I pleased.  I found my pendants at Michael's and Hobby Lobby for less than $5 each.  Use your coupons!
*Yes, my daughter's hair sticks up in a mohawk no matter what I do to it!  So sweet! *

A silhouette of your child printed out for the correct size of your pendant - I took pictures on my iPhone, emailed them to myself, and created my own silhouettes in Photoshop.  I then cut them out using my Silhouette Cameo and glued them onto white card stock.  My locket/pendant is double-sided, so I glued a silhouette on each side.

A length of chain - I purchased mine at Hobby Lobby...don't forget to use a coupon!


Simply insert your printed, trimmed silhouette, add the locket(s) to a chain, and add it to your chain!  You'll get lots of compliments...even more so when you say "I did it myself!"  These make great gifts for moms and grandmas, too!


Linky Parties I love:

Monday, January 14, 2013

estate sale finds...

I have hit up a few estate sales lately and have found some fantastic finds...but these are my favorite "finds"! We went to an estate sale on Friday at the home of a man who lived to be 99. I can't imagine the stories that he could tell!

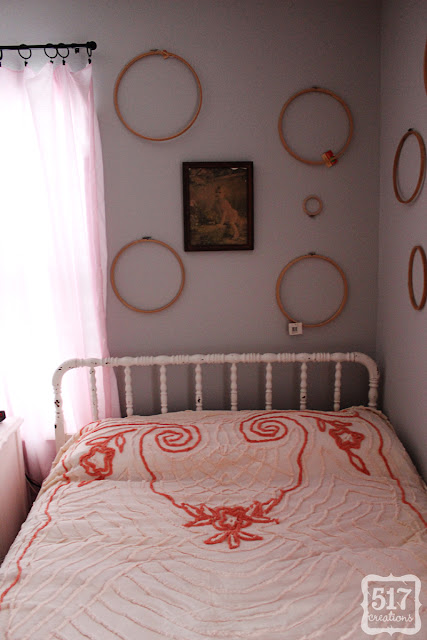
As with most estate sales, I headed straight for the "linens" section. I typically find some great sheets and fabrics, but I feel like I hit the jackpot this time.  There were 2 large chenille bedspreads for a fabulous price, so I quickly snatched them up.  I wasn't picky about the condition because I could always cut them up to make pillows, etc.  I brought them up and laid them out on the Jenny Lind bed in MK's room to inspect and found that they are in excellent condition!  There are a few worn spots but I think that's part of the beauty of vintage linens.

Here are the two chenille bedspreads that I found...


A beautiful peachy-pink spread with some darker salmon-colored patterns...


Don't you love the look of that chenille next to the spindles of the antique Jenny Lind bed?!
 

The next one is this gorgeous creamy white colored spread with yellow flowers.  I love it!


A little close-up...


Don't mind the empty embroidery hoops or the price tags hanging from some of them.  I have grand plans for that corner of MK's room!  I hope to be able to share "after" photos with you soon!

Do you love vintage linens as much as I do?

Thursday, January 10, 2013

quick felt flower clip...


Mollie and I had a Girl's Night Out with a fabulous group of women last night, so I whipped up a cute felt flower clip to match her outfit!  I had everything on hand, so it was free for me, but you could make this for less than $1.

You'll need an alligator clip, 1 sheet of felt for your flower (you'll use about 1/3 of a sheet depending on the size of your flowers), green felt for the leaves, and your hot glue gun.

I loosely followed this tutorial at Craftiness Is Not Optional, but had to cut my own flowers (she uses an Accuquilt cutter for hers).  I just 5 8-petal flowers that were about 2 inches in diameter.  I cut a circle of felt as a "base", hot glued the leaves on, and then layered my flower on.  Once all of the petals were glued on, I glued the flower to an alligator clip and clipped it to an elastic headband.

Once you get the hang of layering the flowers you can crank these clips out in no time!  How cute would a set of these clips be for a baby shower gift?

Happy crafting!

Tuesday, January 8, 2013

mk's newborn photos...

You have already seen a couple of Mollie Kate's newborn photos here, but I just love all of the photos that I wanted to post a few more!  It's amazing how much she has changed in just 6 weeks...


Two of the cutest kids I have ever seen!


I LOVE this picture...the cameo that Mollie is wearing belonged to her great, great-grandmother. My grandma gave it to me to pass along to Mollie when she gets older. So sweet!


Many thanks to Sarah of Memories Composed Photography for these treasured photos!

Friday, January 4, 2013

Mollie's first snow...

We had our first "real" snow on January 1 so we took the opportunity to introduce Mollie to it! I sure am glad we went out first thing in the morning...it was totally melted away a few hours later due to the rain.


I know one little boy who is looking forward to more snow this winter!


Thursday, January 3, 2013

Happy 2013!

Just popping in to say Happy 2013!  I have spent the last 5 1/2 weeks staring at this beautiful baby girl and her handsome big brother!


I haven't forgotten about the blog...in fact, I have several projects that are ready to be shared.  Stay tuned!
Related Posts Plugin for WordPress, Blogger...