Saturday, December 31, 2011

2011 in photos…

calendar_front_pics

I made this collage for a little secret project (that I will tell you more about next week!) and thought it was too cute not to share.  My how my little boy has grown over the past year.

Happy New Year’s Eve!

Friday, December 30, 2011

a year in review…

Can you believe that we’re in the home stretch of 2011?  2011 has been wonderful but the thought of a clean slate for a new year is very refreshing.

It’s been a fun year for this little blog.  I’m still admittedly very shocked when someone I know in “real life” mentions reading my blog or comments on a project that I’ve done, but it’s still so fun. Many, many thanks to all of you who have been reading this year!

Let’s take a look back at some of my favorite (and most read) posts/projects from 2011…

Ruler Growth Chart: Pottery Barn Knock Off…


**The lyrics are from a Laura Story song, “Blessings”, not 1 Thessalonians 5:16-18.  The reference is there just for a related scripture.**


May you find the joy in the journey in 2012!

********************

Thursday, December 29, 2011

thankful ornaments…

***This was originally a guest post over at Cap’s Creations blog the other day.  I thought I’d post it here as well. Enjoy!***

The project I wanted to share with you today is a little something that you can do with your kids before you pack away all of your Christmas decorations.  I called it our thankful ornament.

We made this one in 2006, just after our first year of marriage, and used to it "record" things that we were thankful for from that year.


I simply typed out things that we were thankful for (on plain computer paper), cut the paper into 1/4 inch strips, rolled them into "curls" in stuck them in the ornament.  I also added some "curls" of red and green scrapbooking paper. 


To make it easier to see what we were thankful for from that year, I created a little tag to attach to the top of the ornament that listed everything. Tie a few ribbons to the top and you're done!


It's a fun tradition and a great way to look back on the great things from the past years!

The girls over at Shanty2Chic just posted a variation on this project a few days ago.  Check it out here.

Wouldn't this be great to do with your kids before New Years?  Especially since you can find all of the Christmas stuff for more than 50% off!

Wednesday, December 28, 2011

a late christmas craft…

Do you still have your Christmas decorations up, trying to make the most of the Christmas season? Or do you put everything away on December 26th, ready for a fresh, clean start?  We definitely keep our decorations up until January 1 to extend the Christmas season a little at our cozy, little house.

If you still have ornaments out and are looking for a great, quick craft to do with your kids, I have one for you…a Rudolph handprint ornament. 

rudolph_handprint_ornament

It will take you more time to gather your supplies for this ornament than it will to complete it, but it’s cute and simple! You’ll need white cardstock, green cardstock (if you wish), brown paint, red paint, and a black marker.

Paint your child’s hand with the brown paint and “stamp” it.  When the paint dries, add Rudolph’s nose using your child’s pinky fingertip (or the end of a paint brush), add eyes and antlers, and write your child’s name and the year on the side.  You can also cut the ornament out and back it with a different color cardstock.  Laminate it for durability, add a ribbon hanger, and you’re done!

rudolph_handprint_ornament2
This is Grayson’s Rudolph from two years ago.  Rudolph’s legs are a little blurry due to getting wet when our pipe burst last year, but I refuse to throw it away.  Memories, right??  Looking back I wish I had used the same hand for the ornaments, so I could have a true progression of Grayson’s growth on the Christmas tree, but there’s always next year! 

***************************************************
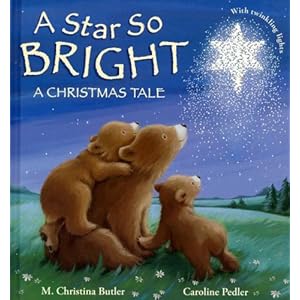
If you’re looking for some Christmas books to add to your collection before you put them away, I have 2 excellent recommendations that we read and love at our house:
This is a sweet story, very well written, with beautiful illustrations.  The excerpt from the back reads:
“The bear cubs awake from their deep winter slumber. 
 ‘What can it be?’ they cry, breathless with wonder.
Where has the mysterious star come from? What can it be? The animals follow the star through the pages of this magical story to find a very special surprise at the end.

A sweet, sweet story of a crippled lamb that feels left out.  The continual reminder for the lamb (and for all of us) is that “God always has a special place for those who feel left out.”  The lamb ends up being present at Jesus’ birth, using his wool to keep the baby warm…being able to be in the exact place in the exact time he was needed only because of his handicap.

I’ve included the Amazon links for you, but I’m sure you’ll be able to find these at your local bookstore – I even found The Crippled Lamb half off at a Lifeway book store yesterday!
Happy reading!

Saturday, December 24, 2011

merry christmas from our family to yours…

card

*LOVED my 50 free cards from Tiny Prints!  They turned out beautifully and I loved sending them to family and friends.  I wish I could send one to all of you!*

 When I came across this card on the TinyPrints website, I knew it was the perfect card for us this year.  I feel so incredibly blessed this year - blessed that I have a wonderful husband, a sweet and enthusiastic 4-year-old, and a cozy home to spend the Christmas holidays in this year.

Thank you so much for reading this little ol’ blog of mine this year!  I love all of the sweet comments and “blog love” that show up in my inbox.  2011 has been a wonderful year, but I’m so looking forward to
2012!


Friday, December 23, 2011

o christmas tree…

christmas_tree1

Our Christmas tree resides in Grayson’s playroom.  It has the perfect picture window at the front of the room, so you get a great view of our tree from the street.  Don’t you love to drive by and see Christmas trees lit up in the windows?

We definitely have a “hodge podge” of a Christmas tree – all ornaments that we made when we were little, were gifted to us, or are part of our yearly tradition.  Scott and I buy each other (or make each other) an ornament each year that sums up the year.  It’s such a great way to look back and see what we were up to in years past!  When Grayson was born, we started buying him an ornament for each year, too.  This year he’s getting a Rudolph ornament as he calls all deer “reindeers”.

Here are  a few of my favorite ornaments:

ornament4

I made these ornaments for our families when Gray was just 3 weeks old.  Can you believe how tiny that footprint was?  He measured his 4-year-old foot against this newborn footprint this year and couldn’t believe how much he’d grown.  Me too, Gray!

ornament1

A pillow ornament with a vinyl window that I made last year. I love that sweet little Santa picture in it – from Grayson’s first Christmas in 2007.

ornament2

Grayson made this sweet clothespin reindeer in preschool this year.  I love it!

ornament3

Our Potterybarn glittered tree topper that we bought our first year disappeared in our move from Austin to Missouri.  It has been officially replaced by this sweet angel that Grayson made at church this year.  He drew the face and colored the angel and glued on “cut outs” of his traced hands.  Love this!

What about you?  Do you have a beautifully decorated “theme” tree?  Or a beautifully decorated tree filled with ornaments made by your kiddos?

Wednesday, December 21, 2011

the halls are decked…


christmas_decorations_entry

Our entry, completed with a little update to my book page wreath…I added another “ring” of sheet music and one of my favorite verses to the middle, along with a little glitter.  My antique little black dresser was also the perfect spot for my Jim Shore nativity (a wedding present from my aunt – love that idea!).  Although, you’ll often find the Little People Nativity pieces mixed in, thanks to Gray.

sheet_music_wreath_center

Our mantle is pretty understated this year.  I saw this sign on Pinterest and knew I wanted to recreate it for our mantle.  I used more of my trusty hymnal to decoupage music sheet onto some thin canvas boards, printed the letters out on my printer, cut them out, and mod podged them on.  I love how it looks and will definitely be keeping it up through the spring!  Maybe a Silhouette Cameo will be under our tree and I can recreate projects like that in half the time!

christmas_decorations_fireplaceit_is_well_sign

I have yet to show my trio of sheet music trees.  They make a great centerpiece for our kitchen table!  You’ve seen the Sheet Music Tree, but the other two were just variations that I came up with.
sheet_music_trees1sheet_music_trees2

Only 4 more days until Christmas…where has the time gone?!  Are you finished with your shopping or just beginning?

I’ll be back with pictures of our Christmas tree tomorrow!

Monday, December 19, 2011

PB’s silver bell swag…my version

I originally saw this Silver Bell Swag in a PB catalog in November…be still my Christmas-decoration-loving-heart.  We hung wreaths on our front windows this year, so I knew I wanted something a little different for our front door.  Enter this beautiful Silver Bell Swag inspiration!

The Christmas decorations in Joplin are a little slim these days – as we have almost an entire town of people that had to replace everything – so the closest I could come to the silver bells were these giant silver jingle bells from the Dollar Tree.

silver_bell_swag1

To start making my own Silver Bell Swag, I collected a bunch of sticks from a tree in our backyard that I bundled together with a zip tie…

silver_bell_swag3

This poor pup of ours thought that Christmas had come early for him when I brought all of the sticks in the house!  He kept a very close watch to make sure I didn’t drop any sticks in the swag-making process.

silver_bell_swag2

To the bundle of sticks, I added 3 faux evergreen picks that I bought at Michael’s – they were 60% off of the $3.99 price!  I was originally going to hot glue them in place, but I just stuck them here and there.  The sticks were bundled together tightly enough that they held the picks in without needing any glue or wire.

IMG_9904

I added a burlap bow to the top, tied the jingle bell on, and my knock off version was done!  I originally bought 2 jingle bells, but the sound of the bells suddenly multiplied to sound like a mini version of the heavenly host as I was working on this during nap time!  Ha!  I was so afraid that I would wake Grayson up with my ridiculously loud jingle bells, so I just added one bell.

silver_bell_swag_knock_off

My version definitely isn’t as full as the PB version – it could use a few more sticks added to the base – but it works for me!  Especially when it cost me around $6 instead of the $69 PB price!

Friday, December 16, 2011

a little "pinspiration" and the dollar tree...

This was one of the first decor ideas that I pinned on my "Christmas" board way back in October.  I loved the simple look of the wreaths tied on the back of the chairs!


                                                                                          Source: 1.bp.blogspot.com via Mary Jo on Pinterest !


I set about to create my own version of the wreaths and ended up doing it for $1!


I found 15 feet of garland at the Dollar Tree for, you guessed it, $1.   I simply cut it in thirds, coiled it up to the size that I wanted, wrapped the ends around each other to secure the wreath, cut a few feet of burlap ribbon and tied it around our kitchen chairs.  It took all of 10 minutes to do but made our kitchen table a little more festive.

I ended up using 1 garland to make 3 wreaths, but might go back and get another one to make the wreaths a little fuller.


 **Please disregard the crumbs on the floor.  I chose decorating before vacuuming today
and snapped these pictures right after the men in our house had eaten lunch!**


Not bad for $1 worth of garland and some beautiful burlap ribbon that a friend gave me!  It's not quite the same as the original - I love the boxwood look of her wreaths, but I'll take what I can get for $1!

Monday, December 12, 2011

the christmas story...

as told by the children of St. Paul's Church, New Zealand. Such an endearing way to tell the Christmas story.


Enjoy!

Thursday, December 8, 2011

fun, friends, and duncan hines


Thanks to Duncan Hines for sponsoring my writing. There's no limit to the baking possibilities, so grab your favorite Duncan Hines mix and Comstock or Wilderness fruit fillings and Bake On! www.duncanhines.com.


cupcakes_toppers
No one wants to talk about the fact that Christmas is only 17 days away (YIKES!!), so let’s talk about one of my favorite topics…holiday desserts!  When asked to bring something for a Christmas party or holiday get-together, I almost always sign up for a dessert.  I love to bake and have accumulated some great recipes.  But, sometimes there isn’t time to spend making a dessert from scratch…so I always keep a box of Duncan Hines cake mix and frosting in my pantry!

In fact, we just celebrated Grayson’s fourth birthday last week and had Duncan Hines cupcakes for his “friend” birthday party.  I was going to make homemade butter cream frosting, but what child really cares about frosting?  I used a Duncan Hines yellow cake mix, piped canned chocolate frosting on, and stuck in a cupcake topper that I designed.  The cupcakes looked great and tasted great!

While checking out the Duncan Hines website, I came across LOTS of yummy sounding recipes.  In fact, I’m going to try this one this weekend to bring to a playdate with Grayson’s friends on Monday.  I’m thinking of having the kiddos decorate their own Gingerbread Men!

************************************************
Duncan Hines Recipe Gingerbread Men


  1. Preheat oven to 375 ºF.
  2. Combine cake mix, flour, eggs, oil, molasses and ginger in large bowl (mixture will be soft). Refrigerate 2 hours.
  3. Place dough on lightly floured surface, cover with waxed paper. Roll dough to 1/4-inch thickness. Cut with gingerbread man cookie cutter. Place 3 inches apart on non-pareils ungreased cookie sheet. Decorate with non pareils.
  4. Bake 8 to 10 minutes or until edges start to brown. Remove immediately to cooling rack.
  5. Makes 12 to 14 six-inch gingerbread men.
************************************************
Don’t those sound delicious?  I’ll let you know next week after I test them!
What are your favorite desserts to make for the holidays?  Does your family have any “traditional” desserts that are always made around this time of year?

Remember to check out Duncan Hines' website www.duncanhines.com to find some great recipes for your holiday get-together! I was selected for this sponsorship by the Clever Girls Collective.

Wednesday, December 7, 2011

cookie exchange wrapping & recipe…

We had our annual cookie exchange at my MOPS group this morning and I knew just what cookie I was going to bake…my double chocolate peanut butter cookies!

I whipped up a batch last night but realized that I didn’t have any paper plates (or disposable trays) to wrap my cookies up.  I racked my brain and remembered a “good thing” from Martha Stewart Living years ago…wrap the cookies in a wax paper tube and tie some ribbon (or tulle) on the ends!

cookie_exchange_wrapping

We were also encouraged to bring the recipe along, so I designed a cute “Christmassy” recipe card in Photoshop, typed out my recipe, printed it on cardstock, and attached it to the tulle.

cookie_exchange_wrapping2

Need a good cookie exchange recipe?  Here’s a copy of my recipe card.  Just save it on your computer and print it out!

double chocolate peanut butter

Want to make your own recipe card for a cookie exchange?  Here’s a blank one you can print out and write your recipe on!  These would also make cute note cards to use during the Christmas season.

recipe_card

Do you have a favorite “go to” cookie recipe?  Or are you more of a “slice and baker”?

Monday, December 5, 2011

Chevron wrap around labels…

Have you ordered your Christmas cards yet?  We should have ours in the mail any day – just waiting on the order to arrive from TinyPrints!  In the mean time I designed the wrap around label for our Christmas cards.  I always print my own labels as soon as I order the cards and then by the time my cards arrive, I have the addresses done!  I simply wrap the labels around, sign the cards, stuff the envelopes, and mail them!

chevron labels_jpg

I’ve created a .pdf version for you if you’d like to download it!

Can you guess what color scheme we used for our Christmas cards?  Do you stick with the traditional red/green colors or branch out a little?
Related Posts Plugin for WordPress, Blogger...